# Creating a Requisition
Requisitions can be created using any of the following options:
- From a List created under My Lists
- From the search result for an Item
- From an existing requisition
- From the Shopping Cart
Once items have been added to a requisition using one option, further items can be added using any other method. To give an example, a new requisition may be created using a List or as a reorder based on an existing requisition. Additional items can be added to this open requisition from another List, existing requisition, from the item search or from the Have you forgotten section on the shopping cart page.
TIP
A user can have only one open requisition at a time. A new requisition can be created after the open requisition has been submitted for approval.
# Create Requisition From a List
A requisition can be created from the personalised lists under My Lists.
Steps
- Access the List from under the My Lists menu.
- The default quantity setup for an item is displayed in the list and can be modified to the requisition quantity, if required.
- Click on the ADD TO CART button found at the bottom of the list to add all the items from the list to the requisition.
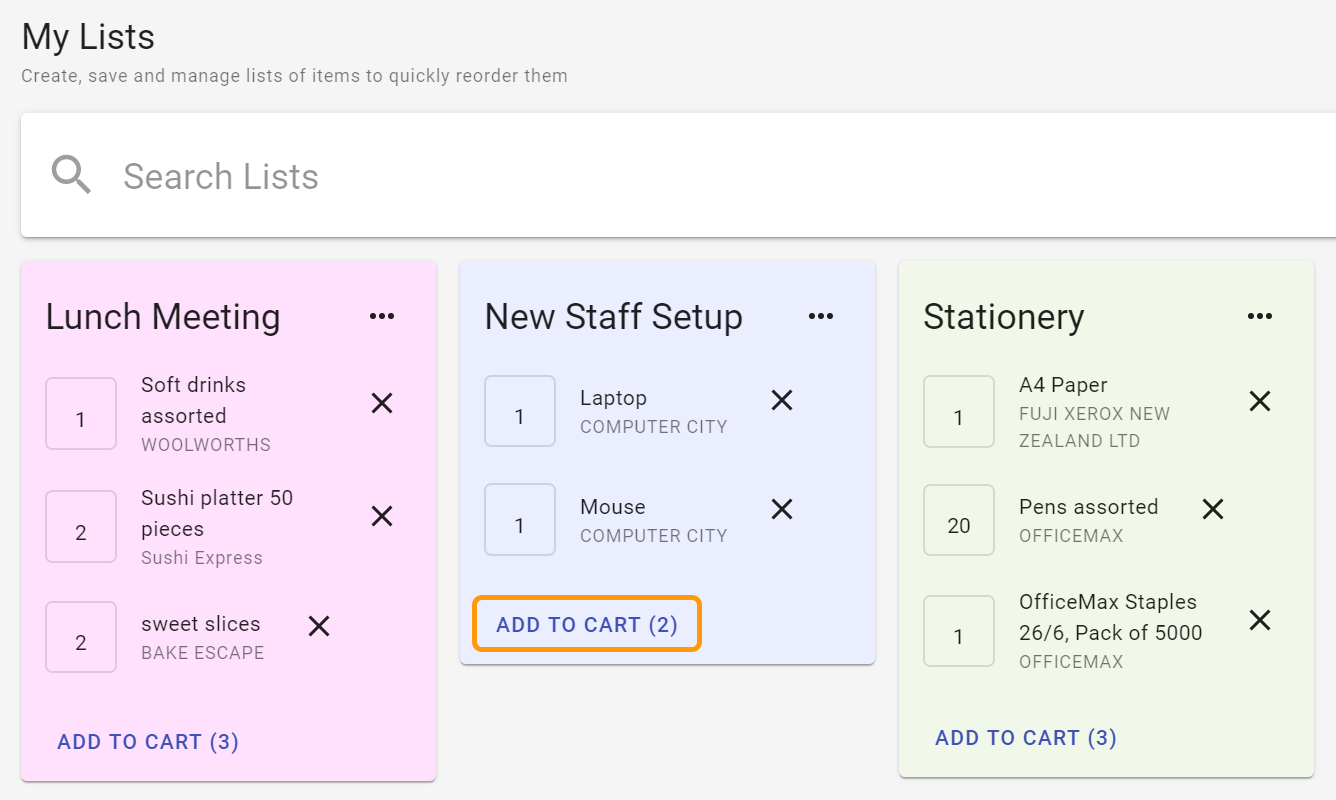
WARNING
If an item in the List is not required for the requisition being created, it can be removed from the requisition. Clicking X for the item in the list removes the item from the list permanently.
# Create Requisition From Item Search
A requisition can be created from the Item search result.
Steps
- From anywhere in DX2 Purchase, access the Search bar at the top of the page next to the DX2 Purchase Logo.
- Make sure the Search is based on Items.
- Enter the search criteria, which can be any part of the product description.
- Add an item to the requisition by clicking on the ADD TO CART button on the required Item card from the search result.
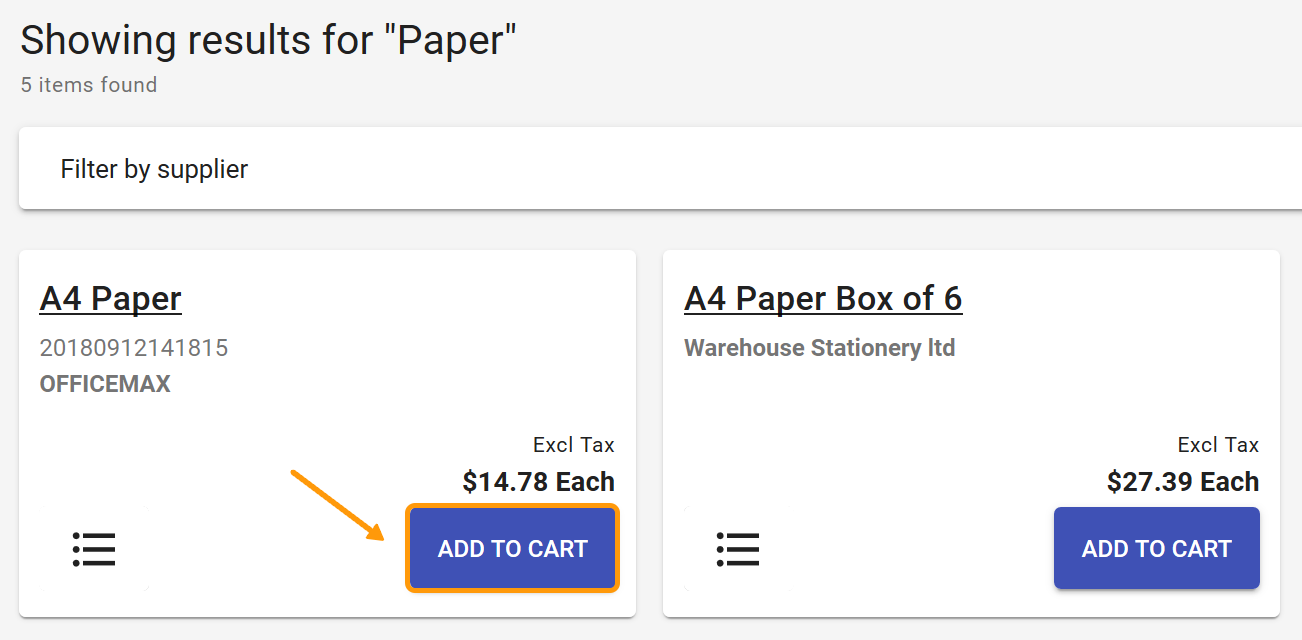
- Once you have clicked the ADD TO CART button you get the option to change the default quantity. Use the arrows to increase/decrease the quantity or highlight the quantity and change it to what is required.

TIP
The ADD TO CART button is not available if the product has already been added to the open requisition.
# Create a new Requisition From an existing Requisition
A requisition can also be created from an existing requisition. This requisition may be at any stage like Pending Approval, Awaiting Delivery Completed or Rejected.
Steps
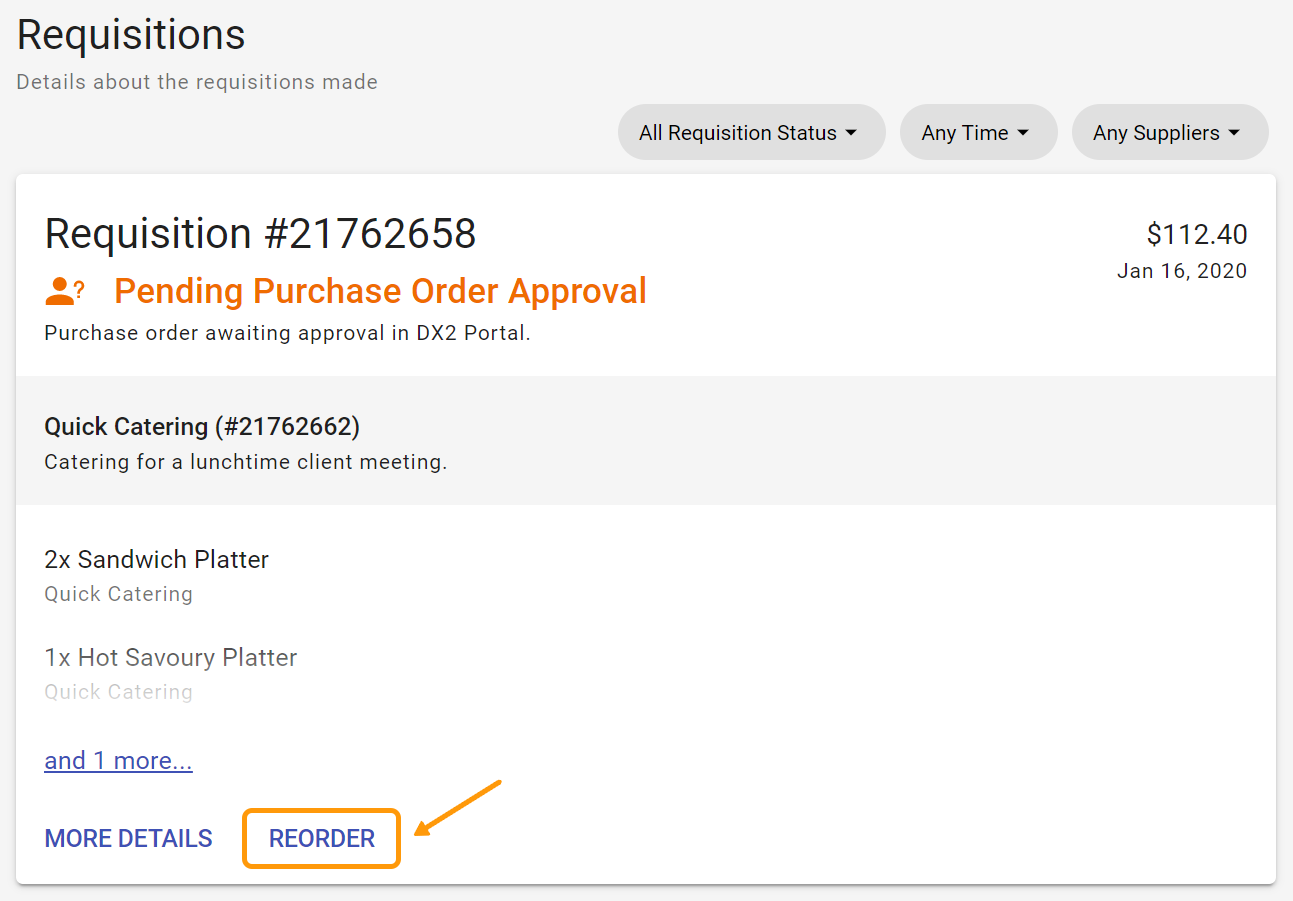
- Recent requisitions can be accessed either from the right hand side of the Home page, or by selecting Requisitions from the side navigation bar.
- Click the REORDER button on the bottom of the requisition card you want to reorder from to add all the items from it into a new requisition.
- The new requisition will retain the items and quantities from the original requisition. These can be modified from the shopping cart.
TIP
The new requisition being created can have items added from multiple existing requisitions. In this scenario, if a particular product exists on multiple requisitions, the quantity requisitioned from each of the requisition will be added for the new requisition. The quantity derived can then be modified from the shopping cart.
# Create Requisition From the Shopping Cart
A requisition can be created directly from the empty shopping cart by adding items from the Have you forgotten section.
Steps
- Click on the Shopping Cart
- Add items to the requisition from the items displayed under the section Have you forgotten?
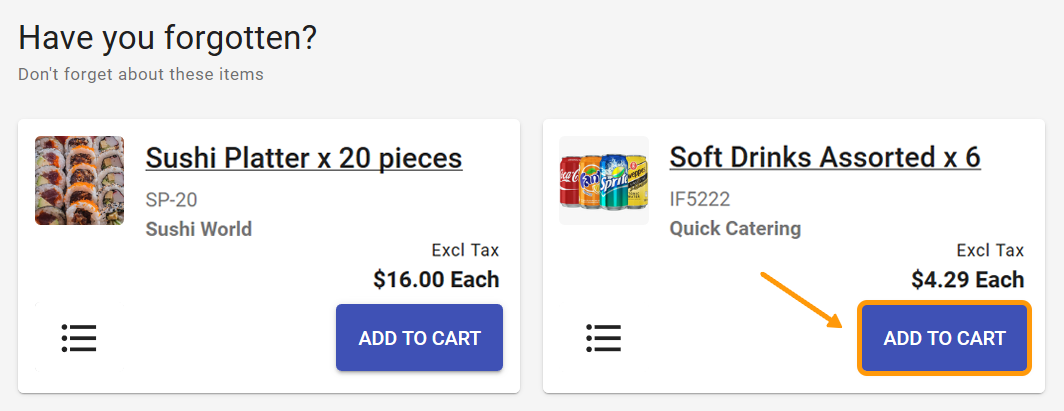
TIP
Purchase will display up to 5 items in the Have you forgotten section based on previous requisitions.
# Submit a Requisition for Approval
Once all the required item(s)/service(s) have been included in the requisition, it needs to be submitted for approval before it can be processed further. The approver can either Accept or Reject the requisition.
An approved requisition will be processed further.
A rejected requisition will not be processed further but can be used to reorder the same items in future.
Steps
Open the requisition by accessing the shopping cart.
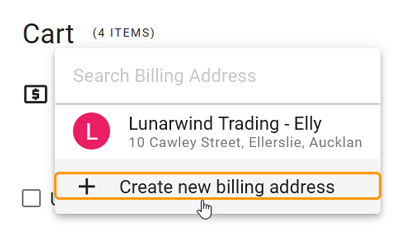
Billing and shipping addresses will default to the last selected addresses. If you are creating a requisition for the first time, these fields may be blank and an address will have to be chosen from the drop down or a new address created.
- The addresses shown by default can be changed by choosing the required address for each field from the drop down list.
- If the required address does not exist in the list, a new address can be created separately for billing and shipping by selecting Create new address from the drop down list. All the fields on the Add New Address form are mandatory except for Address Line 2.
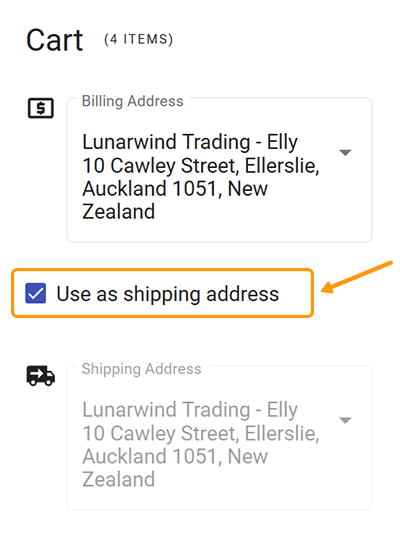
- Where applicable, the billing address can be used as the shipping address by ticking the Use as shipping address box. If the billing addres has not already been set up as shipping address, DX2 Purchase will create it as a shipping address.
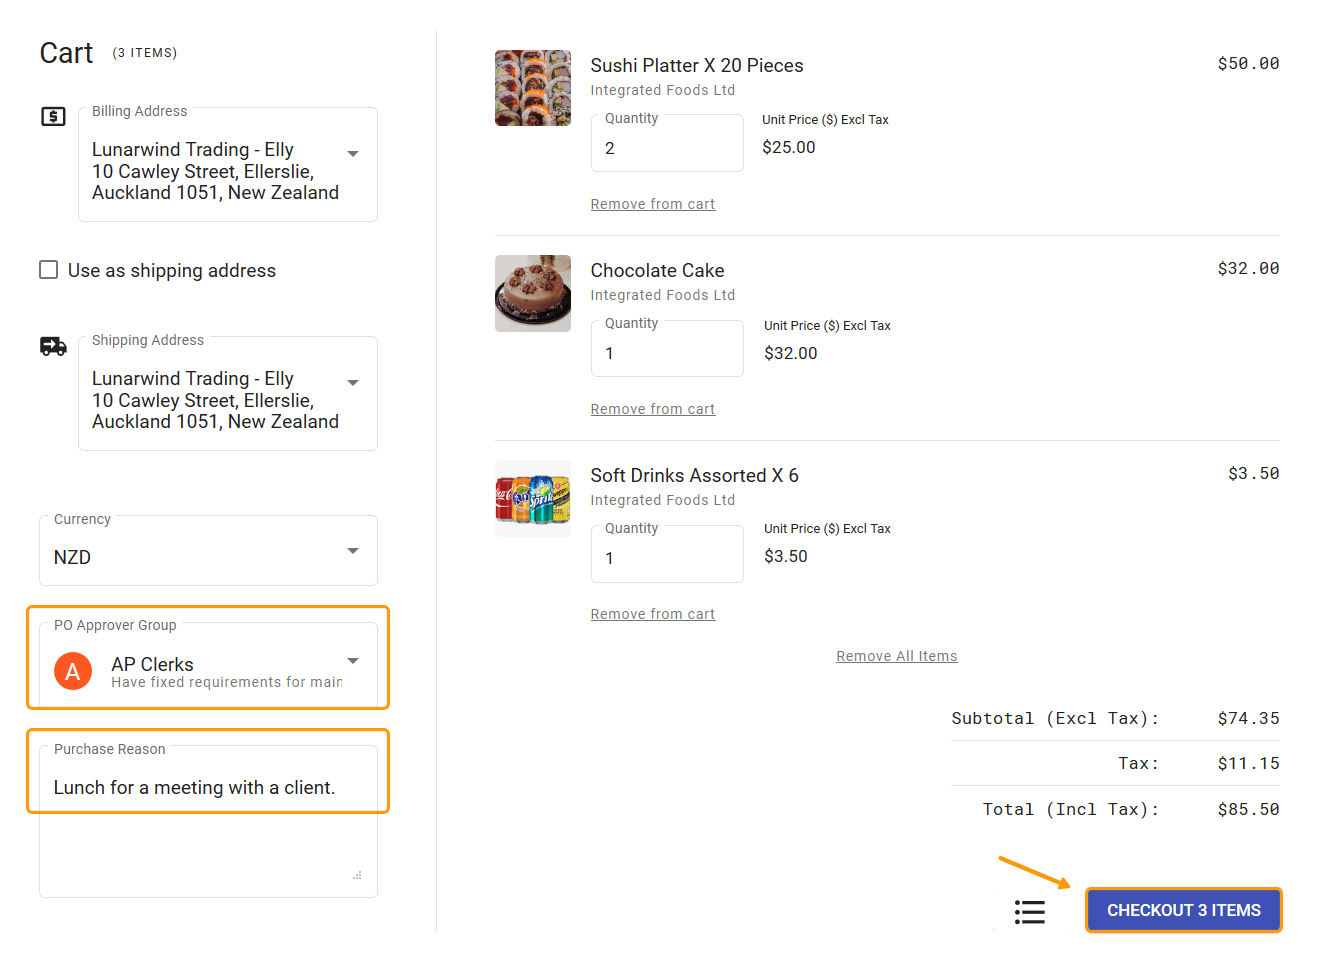
- Select the currency from the drop down list.
- Select the Approver or PO Approver Group from the drop down list.
- Enter the Purchase Reason.
- From the shopping cart screen, click on the CHECKOUT ITEMS button.
- The Review Requisition screen gives an option to go back to the cart if any changes are required to be made. If you are happy with the contents of the requisition click on the PLACE REQUISITION button to proceed.

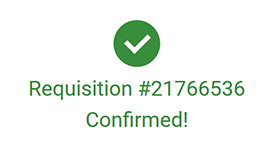
- On placing the requisition, a confirmation screen will come up showing the requisition number.
- The requisition is now ready for the approval process.