# Templates in Capture
Upon uploading a Capture document, you can configure how data is captured from this document, then save this configuration as a template. Saving a template will allow for quick reuse of this Capture configuration in the future.
TIP
You will only need to save a template once per supplier. The next time they send an invoice, you can choose to capture this document using an existing template. If the Trading Partner/supplier changes their invoice, you can update the mapping and save the template for future use.
# Create New Template
To get started, click on an uploaded Capture file to open the document. In the following screen, click Create New Template.
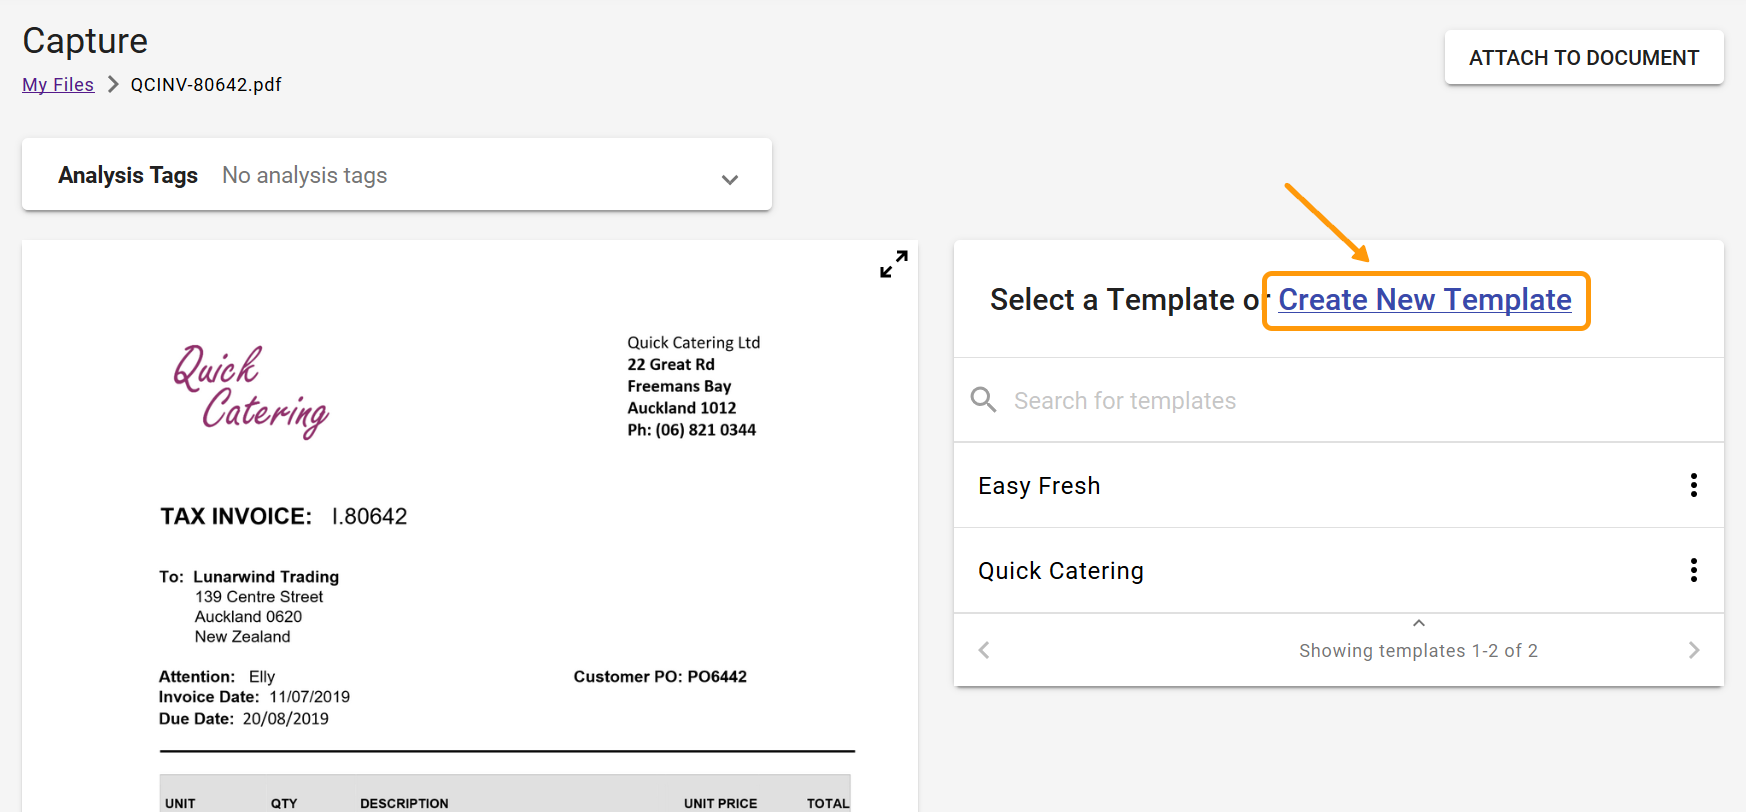
The right pane changes to the New Template screen, which allows you to map the various fields of your captured file to the resulting invoice.
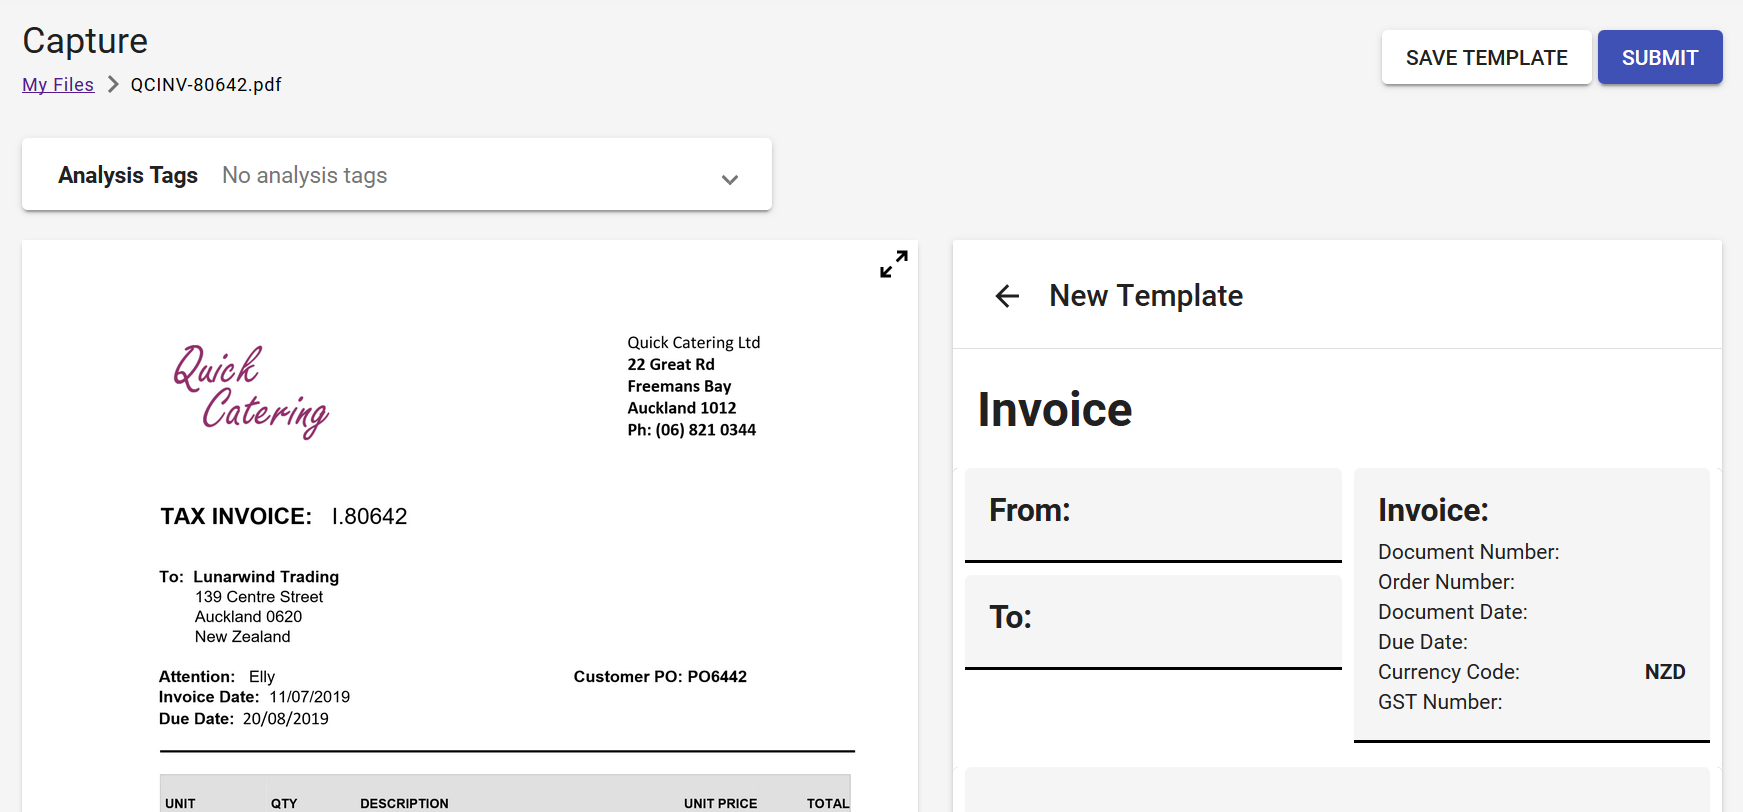
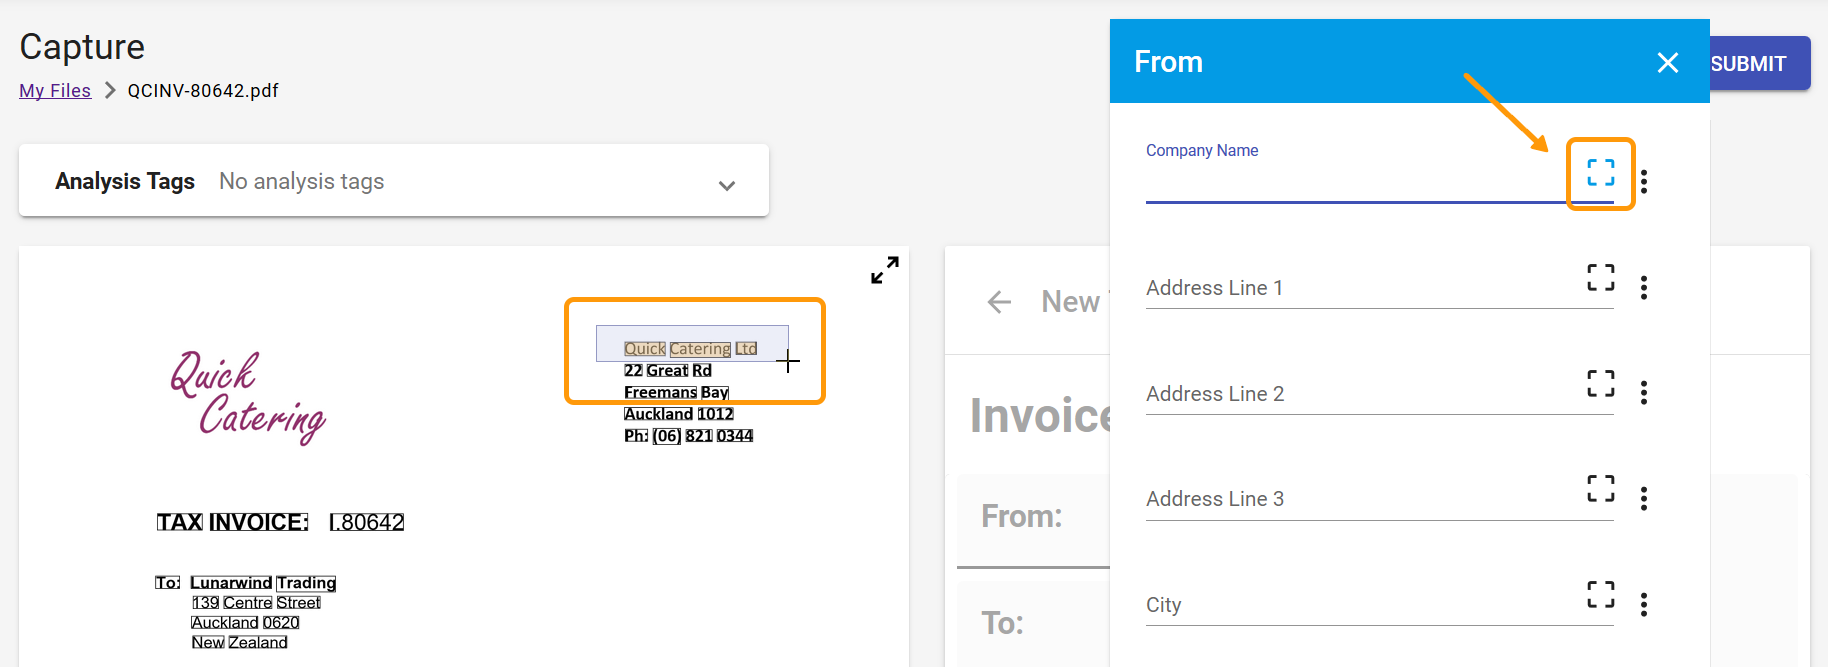
Editable sections of your invoice will be shown in grey boxes. Click on an editable section to start mapping information into that section from your captured file. You can type into the fields, or select the Capture tool , then click and drag the mouse over the area you want to record.
TIP
The capture tool used for mapping data from your captured files to the resulting invoice is comprehensive and flexible. As a result, it is recommended that you learn more about the tool before using it. See Mappings in Capture for more information.
# Saving Templates
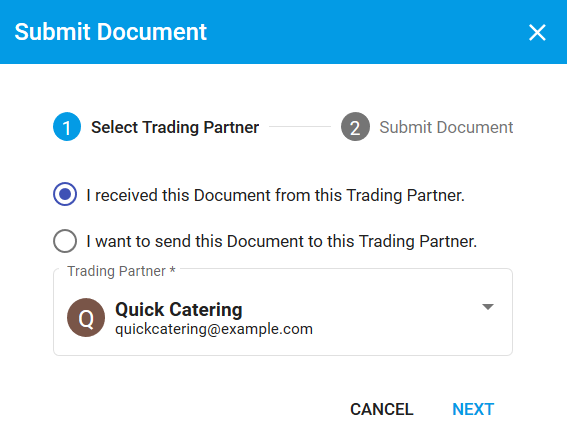
Once a template has been configured with the appropriate fields, you can save it for future use with the current Trading Partner/Document. This can be done in one of two ways:
# Through Capture Document Submission
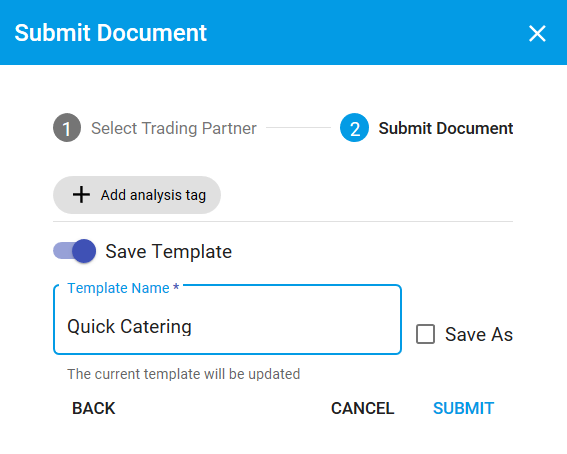
Click the Submit button, found in the top-right corner of the screen.
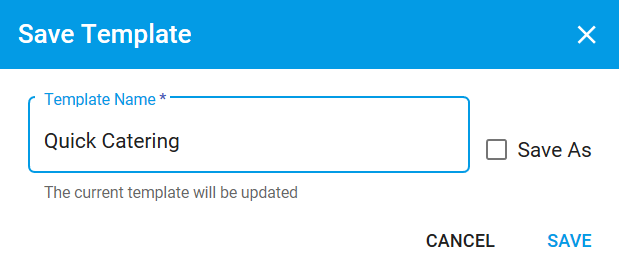
Fill out the Template Name field, then set the Save Template switch to the on (coloured) position. Fill out the Template Name field, then click Submit to save the template. To make changes to the Captured Document, click Cancel.
TIP
If the current Capture file is already associated with a template, this will update it (and will display a confirmation message below the Template Name field). To instead save a new one, ensure the Save As checkbox is checked.
# Manually
Click the Save Template button, found in the top-right corner of the screen.
The remainder of the template saving process is similar to the process shown above: Fill out the Template Name field, then click Save. If you do not wish to save a template, click Cancel.